It is a crucial component designed to protect your roof from the elements, specifically vulnerable areas prone to water penetration. Also known as an ice and water shield, it is engineered to seal around nail penetrations and withstand extreme weather, preventing water damage, leakages, and the formation of ice dams – safeguarding the integrity of your home’s roofing system.
Key Takeaways
Ice and water barriers are rubberized underlays that protect roofs from water damage by creating a watertight seal that repels water and prevents leaks, especially in areas prone to ice dams or severe weather.
These barriers provide crucial roof protection against leaks, ice dams, and wind-driven rain, ensuring water flows off the roof instead of seeping in, and complement the durability of the roof’s structural integrity.
Installation of ice and water barriers is a precise process that must follow manufacturer guidelines and local building codes, often with costs averaging around $550 including materials and installation for enhanced roof protection.
Understanding Ice and Water Barriers
An ice and water barrier is a rubberized, waterproof underlayment that protects critical areas of your roof from leaks and water damage. Think of it as a protective cloak for your roof, deflecting water so that it cascades off rather than infiltrating the roof decking. Far more than just an ordinary layer, this powerful shield forms secure watertight seals around nail holes while also acting to minimize moisture ingress by serving as a vapor retarder.
The outstanding efficacy of these barriers lies in their use of modified bitumen adhesive on the reverse side, which adheres firmly to the roof deck without requiring it to be nailed down—providing an unparalleled level of protection where susceptibility to ice dams or intense weather conditions exists. Whether facing down torrential rains or battling through blizzard conditions, you can count on the steadfast defense against the elements provided by an ice and water barrier installed atop your home’s roofing system.
The Importance of Ice and Water Barriers for Your Roof
Barriers designed for ice and water are essential in preserving the integrity of your roofing system. Their crucial function is to avert leaks, hinder the formation of ice dams, and offer defense against rain propelled by strong winds on roofs. The protection they afford extends beyond just shielding shingles or other roof coverings. They provide an additional layer of security to your roof decking from any water infiltration beneath shingles or various roofing materials.
As an advanced protective measure for your new roof, these barriers prevent moisture penetration into its underlying structure (your home). This is particularly vital with premium roof systems that feature dependable construction within areas like roof valleys where vulnerabilities may otherwise exist.
Preventing Leaks
Consider the ice and water barrier as a reliable protective layer that intercepts leaks before they can cause harm. It accomplishes this by establishing a seal that is impervious to moisture. This isn’t simply a superficial protection but penetrates below the surface level. The self-sealing property of these barriers stops water from infiltrating beneath shingles in icy conditions or during storms, thereby diminishing the likelihood of leakage.
Such barriers are applied directly atop the roof decking, right under where shingles lay, ensuring there’s no room for any water penetration. This close bond with the roof deck is crucial in averting leaks, securing your roof against wetness and potential damage. Thus, you’re able to comfortably relax indoors even when tempestuous weather prevails outside because your roofing structure remains secure against leaks – keeping thoughts of an imminent roof replacement at bay for considerably longer periods.
Protecting Against Ice Dams
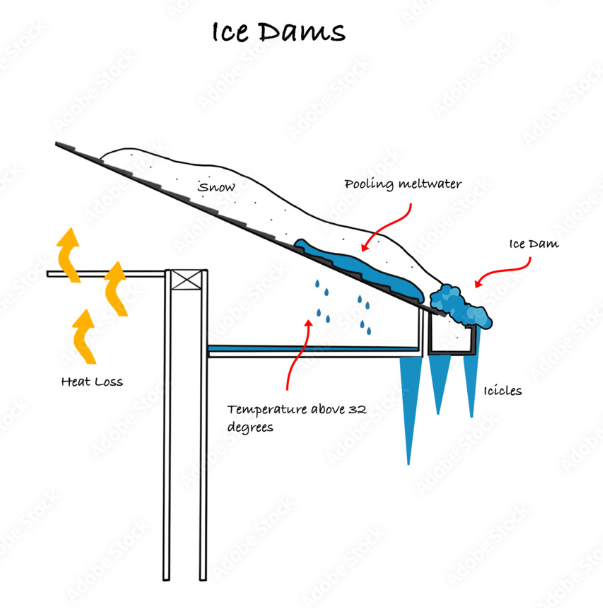
During the cold winter months, ice dams pose a significant threat to roofs. These dense accumulations of ice emerge when snow melts and flows down to the edge of a roof before it re-freezes there. As this occurs, water may gather behind the dam and leak into the structure below as it searches for an easy exit route. Chunks of dislodged ice can fall dangerously from these formations, risking injury or damage to property.
To combat these menacing blocks of ice, specialized barriers known as “ice and water” shields are employed. These defenses excel in blocking water that is forced underneath shingles due to the presence of an ice dam—specifically engineered for such scenarios—to stop leaks from occurring. By averting the creation of an ice dam altogether with these protections in place, one not only prevents potential interior water damage but also staves off any associated issues like mold or mildew buildup which tend to follow after moisture intrusion incidents.
Guarding Against Wind-Driven Rain
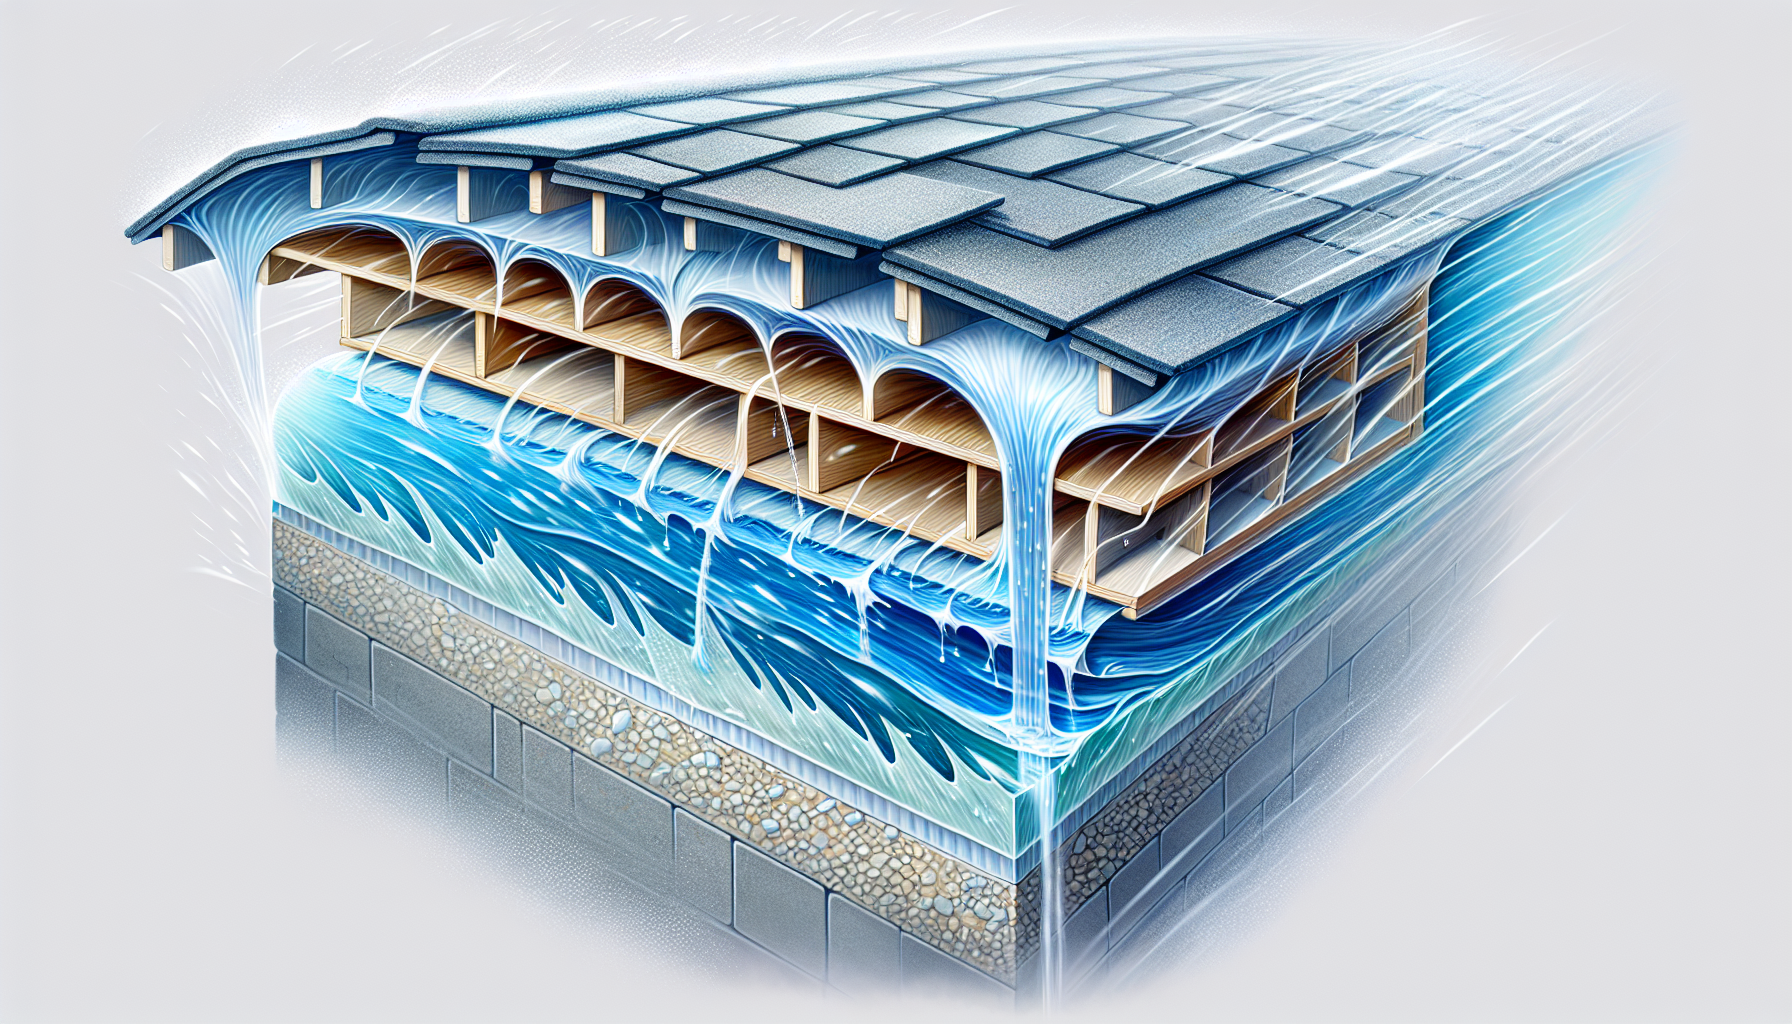
Can we pause to laugh at how AI thinks "wind-driven rain" should be illustrated? OK, back to it...
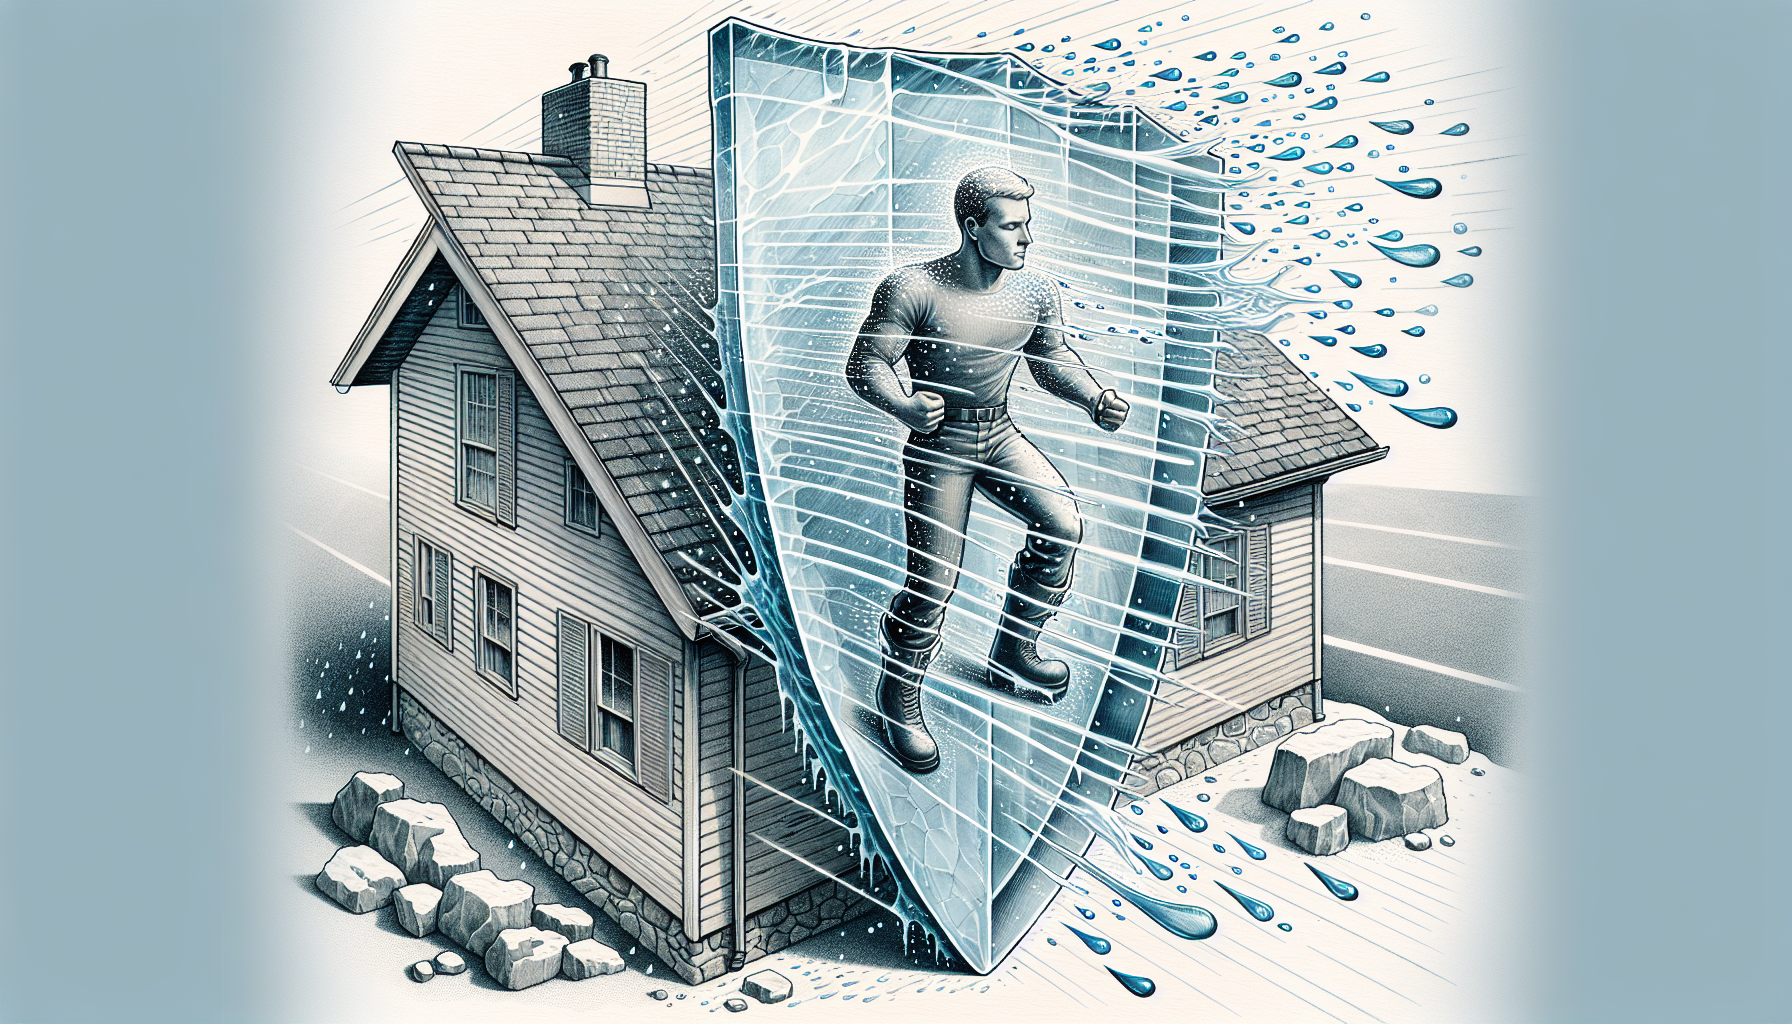
Imagine the ice and water barrier as your roof's steadfast guardian, standing strong against the onslaught of wind-driven rain. Now, wind-driven rain is rain that's pushed by strong winds, hitting your roof at an angle with force. This kind of rain can be a real test for any roof, but that's where the barrier comes in. It acts like an impenetrable fortress, repelling the relentless downpour and ensuring that your shingles stay exactly where they should be. It maintains a watertight embrace with the roof deck, guiding water safely away to the gutters. In areas that are frequently in the path of severe storms or hurricanes, you simply can't do without an ice and water barrier. It's the kind of protection that keeps your home dry and secure, even when the weather throws its worst at you.
These barriers are more than just useful; they're essential for keeping your roof doing what it's supposed to do: keeping water out. How Ice and Water Barriers Save Your Livable Space from Water Penetration
Imagine you're observing an exterior wall of your house. Snow blankets the roof, and as the sun peeks out, it gently warms the rooftop. The bottom layer of snow starts to melt, and water trickles down the slope of your roof. But, as the temperature dips again, this water refreezes at the roof's edge, forming an ice dam. This dam prevents subsequent meltwater from draining off the roof, leading it to back up under the shingles and seep through the roof deck.
Now, let's consider the role of ice and water barriers in this scenario. These barriers act as a superhero for your home, strategically installed beneath the shingles to create a seal that's impervious to water. When an ice dam forms, the water that pools behind it has no place to go—except through the roof, into the attic, and potentially into your living space, causing damage to ceilings, walls, and insulation. But with an ice and water barrier, this potential intruder is stopped in its tracks. The barrier's rubberized material adheres to the roof decking, and its self-sealing properties around nail penetrations ensure that water can't sneak through.
The ice and water barrier is your roof's secret weapon, designed to maintain the sanctity of your living space by preventing water from the ice dam from penetrating your home. It's the difference between a cozy, dry winter indoors and the nightmare of water damage repairs.
Different Types of Ice and Water Barriers
Just like superheroes have their unique abilities, the world of ice and water barriers offers a variety of specialized features to choose from. Take the granular surface barriers, for instance – they have this gritty texture that's somewhat akin to sandpaper. These are the go-to choice for many homes because they cling to the roof deck like a burr and create a waterproof seal that's tighter than a drum around nail holes.
Now, let's chat about the smooth ice and water barriers. They're the sleek, undercover agents of the barrier world with their:
Slip-resistant polymer modified asphalt membranes
Tough surfaces backed by polyester fabric
Shields against the harsh rays of ultraviolet light
Flexibility that allows for easy adjustments during installation
Both types, with their self-adhering prowess, are quite the contenders when it comes to locking out unwanted moisture.
And for those metal roofs that like to move and groove with temperature changes, we've got high heat specific ice and water shields. These guys come with fibers that remind you of cotton, ready to take on the expansion and contraction of metal panels without missing a beat, ensuring your roof's defense mechanisms stay on point.
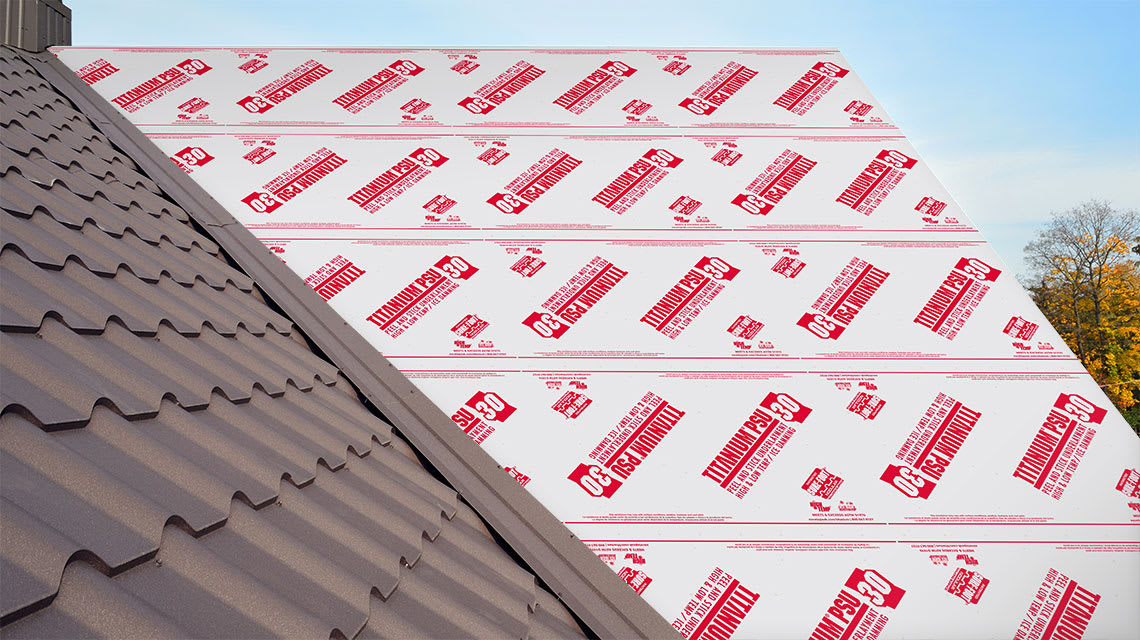
Owens Corning PSU-30: The Premier Choice for Idaho Roofs
In the quest for the ultimate ice and water barrier, Idaho homeowners and contractors often turn to Owens Corning PSU-30 as the gold standard. This exceptional product is not just any ordinary underlayment; it's a powerhouse of protection designed specifically to withstand the unique weather challenges that Idaho's climate presents.
Owens Corning PSU-30 is a high-quality, rubberized asphalt underlayment reinforced with a sturdy, non-woven polyester mat which makes it highly durable and tear-resistant. This combination of materials ensures that it can cope with the extreme temperature variations that are characteristic of the Idaho climate—from scorching summers to freezing winters.
One of the standout features of PSU-30 is its ability to form a watertight seal around the nails that penetrate through it. This is crucial for preventing water ingress that can lead to roof deck damage, particularly during the winter months when ice dams are a common concern. Ice dams can cause meltwater to back up under shingles, but with PSU-30, this water is stopped in its tracks, preventing costly damage to the interior of the home.
Furthermore, Owens Corning PSU-30 offers superior adhesion capabilities. Its rubberized asphalt layer creates a bond with the roof deck that is so strong, it virtually eliminates the risk of the underlayment peeling away or blowing off—even in the face of Idaho's sometimes fierce windstorms.
The ease of installation is another reason why PSU-30 is a favorite among roofing professionals. Its split-release liner peels off effortlessly, allowing for quick and precise application. This not only saves valuable time but also reduces labor costs, making it a cost-effective solution for comprehensive roof protection.
For Idahoans, the choice is clear: Owens Corning PSU-30 is the best line of defense against the elements. Its unmatched durability, strong adhesive qualities, and exceptional sealing around nail penetrations make it the premier choice for safeguarding homes from the challenges posed by ice, water, and wind.
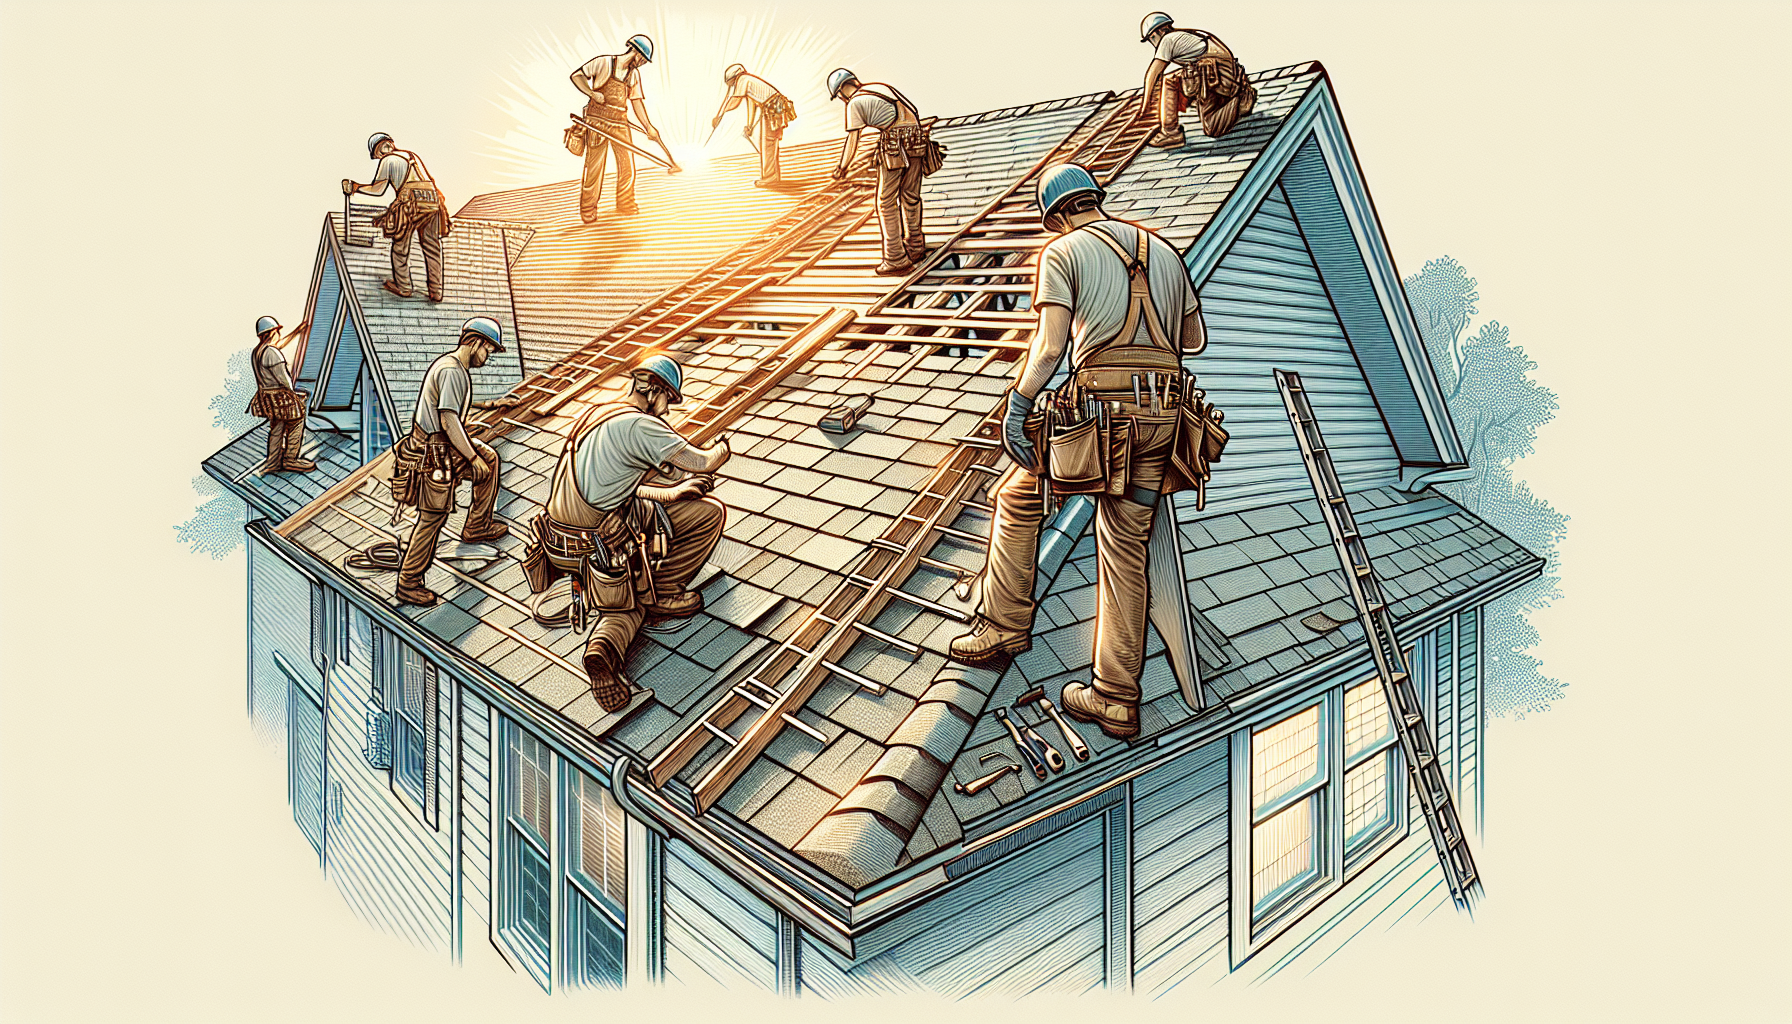
Installation Process and Best Practices
Installing an ice and water shield is essentially like building the foundational defense for a stronghold. The process requires meticulous preparation of the roof deck, accurate measurements of necessary materials, and strict compliance with installation instructions provided by manufacturers to effectively establish ice protection.
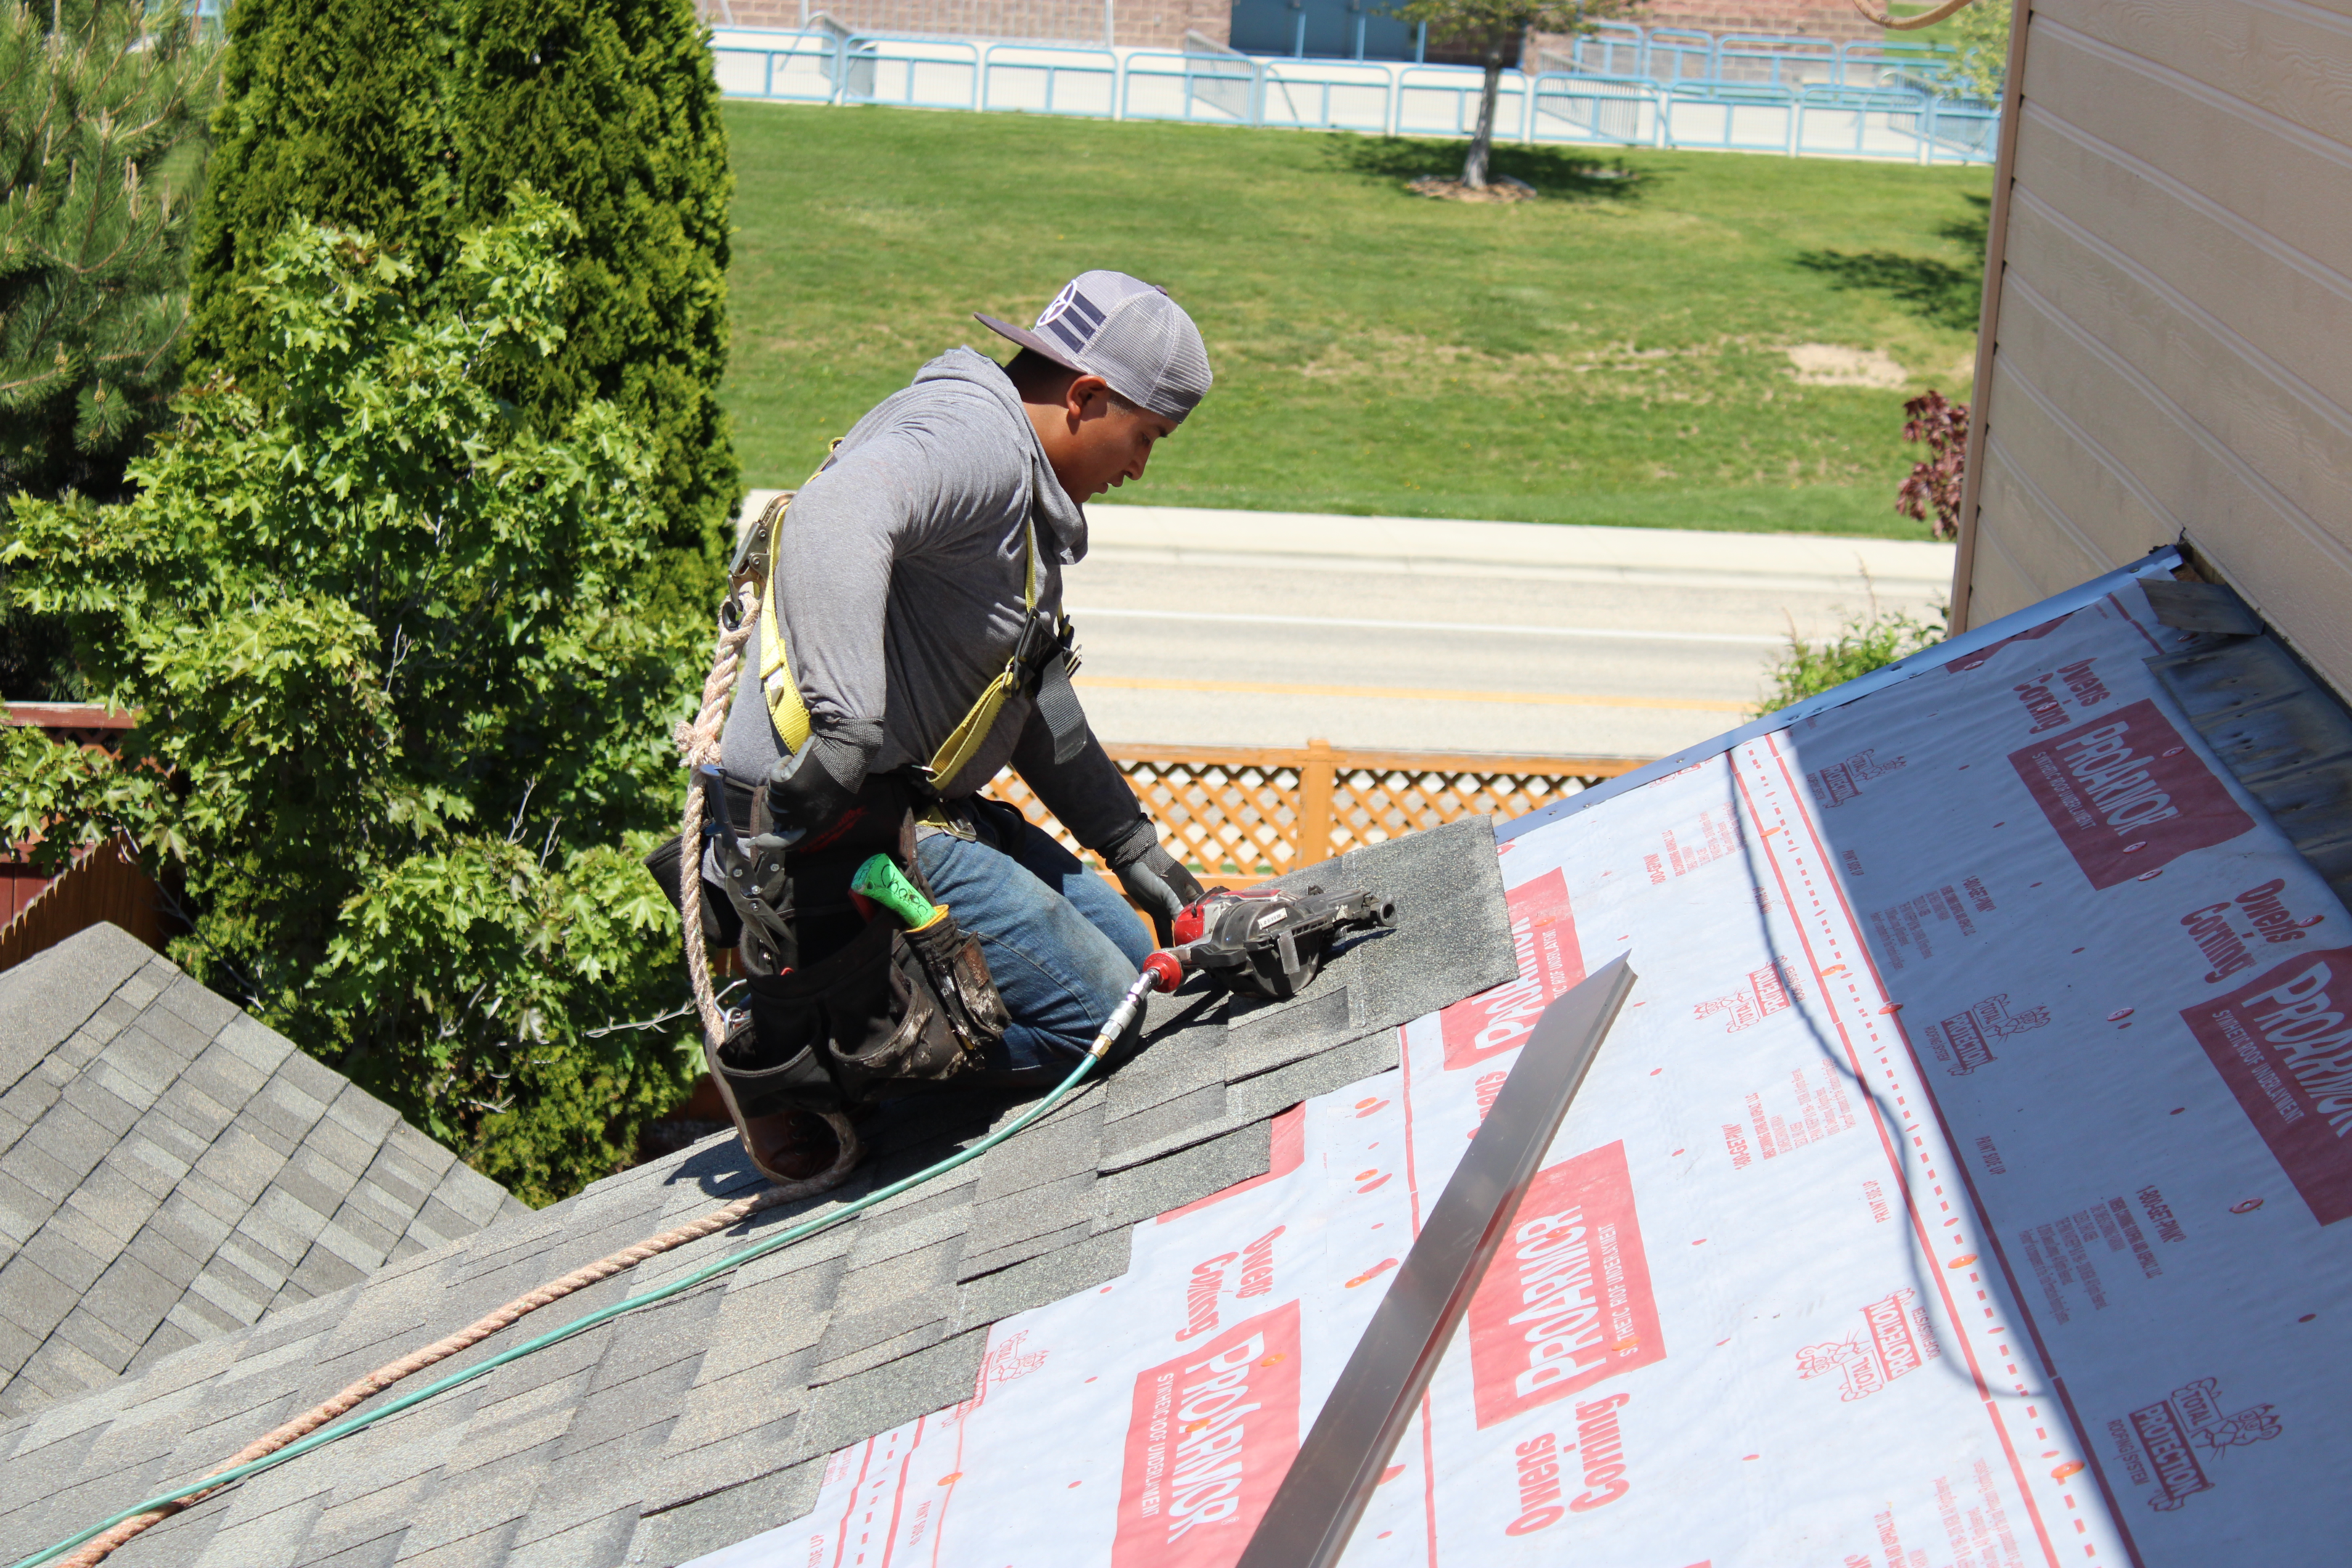
It is essential to thoroughly clean the roof decking, removing any debris in order to ensure that the adhesive bonds successfully. Typically placed after fitting the drip edge on the eves (not rakes) but before laying down other underlayments, this step lays the groundwork for installing the ice and water protector.
Beginning the installation of the Titanium® PSU30 underlayment requires a clean, dry, and smooth roof deck. Initiate by positioning the first strip of PSU30 along the eaves, taking care to align it precisely for a straight foundation. This underlayment should extend beyond the eave edge and any installed drip edge metal by a minimum of 1/4 to 3/8 inches. This careful alignment sets the stage for the rest of the application. Start by peeling back a section of the release liner, pressing the underlayment onto the deck, and continue to roll out the material, removing the liner bit by bit to prevent creases and ensure a flat lay. Employ a hand roller to secure the underlayment, promoting complete contact and adherence to the roof deck.
For subsequent layers, maintain a minimum overlap of 6 inches with the preceding layer to ensure a continuous watertight seal. Pay special attention to valleys, ridges, or any roof penetrations. The underlayment must be tailored to fit snugly around these features, with additional material laid in valleys to extend up each side. Apply a recommended sealant to all overlaps and edges to reinforce the underlayment's resistance to water. Lastly, for optimal performance of the underlayment in preventing water entry, adhere to the manufacturer’s specific instructions regarding overlaps, sealing methods, and other installation particulars.
Building Code Requirements and Recommendations
Local building codes in many counties and jurisdictions require that a water shield specifically designed to combat ice damming be installed at the edges of roofs, especially in areas susceptible to significant snowfall.
According to guidelines set by the International Residential Code (IRC), an effective ice barrier is required to consist either of dual layers of bonded underlayment or a self-adhesive polymer-modified bitumen sheet like PSU-30. This protective layer must extend a minimum distance of 24 inches past where it crosses over the exterior wall line within any given structure. Think of it as going 24 inches past the wall to the inside of your home. On roofs with slopes measuring equal to or steeper than an 8-in-12 pitch (a slope percentage reaching 67 percent), this regulation mandates extending such barriers no less than 36 inches from where they begin at the edge of the roof.
For slopes up to 3-in-12, we HIGHLY recommend you use PSU-30 on your entire roof.
Maintenance and Lifespan of Ice and Water Barriers
When installed properly, ice and water shields require little to no upkeep. Their durability is dependent on both the caliber of the materials used and the conditions they are exposed to. Over time, these protective barriers may lose their effectiveness if subjected to extended sun exposure. The PSU30 underlayment offers significant UV protection and is designed to withstand exposure to sunlight for extended periods without degrading. This is particularly beneficial during construction or renovation projects that may experience delays, ensuring the underlayment remains effective until the final roofing material is installed. Typically, high-quality synthetic underlayments like the PSU30 can provide UV protection for up to 6 months, allowing ample time for construction to proceed without compromising the underlayment's performance.
It’s imperative to carry out routine inspections on your roof to preserve performance over time. Several precautionary steps worth considering include:
Regularly trimming nearby trees to prevent roof damage
Looking for any indicators of wear or degradation on the shields
Removing debris or fallen leaves from atop the shield surfaces
Ensuring that installation has been done accurately with proper sealing
Such preventative measures are key in safeguarding both the structural integrity and functionality of your ice and water barriers.
When installing an ice-water shield it’s important not to overlook ventilation needs because these shields can function as a continuous vapor barrier which might cause moisture accumulation within attics if not adequately addressed. Read that again, it's important!
Alternatives to Ice and Water Barriers
Other options exist for safeguarding your roof besides ice and water barriers. Synthetic underlayments constructed from materials such as polyethylene or polypropylene are a solid, lightweight, water-resistant choice for roofing. These alternatives boast greater tear resistance and UV protection when compared to conventional felt underlayments, providing a robust solution.
Underlayments made of rubberized asphalt provide flexibility and can self-seal around nails, thereby reducing the risk of leaks. Mats crafted from fiberglass or polyester serve as viable substitutes to standard ice and water shields thanks to their durability and capacity to strengthen the roof deck.
If you're considering investing in your roof, the number one thing to prioritize is a top-notch ice and water barrier. For those living in Idaho, we highly recommend PSU-30 as the choice for unparalleled roof protection. This superior underlayment offers robust defense against the unique weather conditions of the region, ensuring your home stays dry and damage-free.
Common Misconceptions About Ice and Water Barriers
There is an idea floating around suggesting that it’s acceptable to position ice and water barriers atop aged shingles. In reality, for them to stick properly and perform optimally, they must adhere directly to a clean roof deck. Another myth suggests such shields restrict roofs from adequately ‘breathing’. Modern technologies ensure these products maintain breathability while simultaneously preventing moisture penetration.
Finally, there’s an incorrect assumption circulating that necessitates frequent upkeep of ice and water barriers once installed. While periodic checks remain important for the overall maintenance of one’s roof integrity. Providing proper installation was carried out initially – minimal maintenance is typically required thereafter if any at all.
Summary
Ice and water barriers are like the unsung heroes of our rooftops, valiantly guarding against leaks, ice dams, and the unwanted water damage that follows. Understanding their role, significance, and the various types available, as well as mastering the art of selection and installation, is crucial for maintaining a strong and watertight roof. Despite some common myths, it's clear that these barriers are absolutely vital for ensuring your roof deck remains dry and secure, no matter what the weather throws at it.
Frequently Asked Questions On Ice And Water Shield.
Should I use it on my whole roof?
Certainly, it is advisable to apply an ice and water shield across the entire roof if your location is prone to severe wind conditions or significant threats from ice dams or rain propelled by strong winds. Ensure that a ventilation system is installed in your attic as a preventive measure against condensation buildup.
If you have a low-slope roof, yes, you should put ice and water on your entire roof. If you have any pitch over 4-in-12, then you should put it on your eaves and valleys.
What is the benefit?
Incorporating an ice and water shield on your roof acts as a protective waterproof barrier, significantly enhancing the defense against damages caused by ice dams and rain propelled by strong winds, safeguarding your roof from possible leakage issues.
Is it the same as underlayment?
No, it's not the same as underlayment. They are waterproof and made from polymers and bitumen, while underlayment is not waterproof and can have staples driven into it.
How does it work?
By establishing a watertight seal that encases nail punctures, an ice and water barrier effectively blocks moisture infiltration. This barrier is directly affixed to the roof decking, aiding in the prevention of leaks and structural damage while simplifying maintenance procedures on the roof where ice and water are concerns.
Subscribe to Idaho Roofing Contractors's Blog


Comments